


Mini Capsule Collections
It’s been over a year since I’ve posted anything on this blog…. but this project was too much fun to not give a full accounting.
It all started with the announcement last year of a new fabric collection by designer Heather Ross with Windham Fabrics, Malibu.

I saw the lush patterns and rich colors of the collection, and I knew I’d need some of those late mid-century vibes in my life. It was really the “wood block” series that struck me the most. The “sayuuta” and “tiny surfers” were cute, but I don’t often have a good use in mind for prints with people in them, the rest however… so many possibilities.
Here’s another conundrum, with so many coordinating pieces how can you choose just one or two for a project? It got me thinking about capsule wardrobes, and how wonderful these might be to create a little collection around.
But these prints, as much as I love them, don’t actually fit into the clothing I’ve been sewing for myself. I just didn’t think I’d wear them much. But I have an amazing friend who has 3 little girls who I could see loving the bold and sweet patterns. I had been playing around with some ideas for capsule collections for the girls already because I am very aware that I cannot possibly keep making things only for myself at the rate I feel the urge to create and play. I’d run out of closet space within the year for sure. Plus these tiny humans are a fun, diminutive bunch to plan clothing for, and space out what I make for myself.


These above is what I had originally been playing with. I knew I had to narrow the ideas down, since I’d be making 3 wardrobes. So I reviewed the ideas and took a look at what I thought would be the most useful mix and match pieces, as well as where I could incorporate the prints.
Here are the sets I came up with:


I decided to pair the cotton prints with a linen/rayon blend. I figured I couldn’t easily find matching colors in the linen for the prints, so I purchased a bolt of white linen and dyed it in batches, working to match the colors in the prints as well as possible. Since these are meant to mix and match, it is important that the colors closely resemble the prints so the little crop t-shirt in the first illustration could be worn just as easily with the checked skirt as the matching culottes. I dyed the linen with RIT dye. I looked for color formulas that seemed like a close match and then adjusted using swatches of the same fabric before dying the larger cuts. The green was an absolute monster to match. I managed to take notes so I could recreate the other colors if I needed to, but that green went through so many changes, including diluting the dye bath by half once that I have no idea what the final formula was.


All of these silhouettes were drawn from patterns I’d found from different designers and saved to a pinterest board when I started playing with the idea of a child’s capsule wardrobe. I had specific things I was looking for, but since I don’t live in the same city as my friend I needed patterns I felt confident would work even if I couldn’t fit the clothing exactly to the girls.
I chose bottoms with elastic waistbands, tops that aren’t very fitted, one dress that would have simple clean lines and one that felt like it belonged at the beach or a picnic.
Note: I purchased all of these patterns and nothing is gifted, so all opinions are purely mine without ulterior motive.
OUTFIT 1: Mingo & Grace Gigi Top, True Bias Mini Emerson Pants

The Gigi pattern from Mingo & Grace has a top and skirt (which I used for the gathered skirt in the next outfit) and were so quick and easy to make, I’m sure i’ll use the pattern again. The Gigi top is a just barely cropped t-shirt designed for wovens. It comes with several options, sleeves/sleeveless and button up or keyhole back. I chose to make these a keyhole back with little covered buttons I made using the flowers in the “block print” fabric. I altered the shape of the keyhole back from a simple slit to a teardrop shape.
The True Bias Mini Emerson pants were almost exactly what I wanted. Most importantly they had a flat front/ elastic back waistband, and pockets. Even little girls should get pockets. I also love the big hem at the bottom. I did make some hacks (which I’m crossing my fingers I did correctly!) to get exactly what I imagined. I converted the pleated front to a flat front and took out a little of the billowy room in the legs to make them a little bit straighter.
I can’t wait to see photos of the girls in these outfits because I think the modern silhouette of the boxy top and crop pants will be adorable on kids. I would wear an adult version of this for sure…. I might have to make one.


Outfit 2: Hello Dear Kids #R56, Mingo & Grace Gigi Skirt

Hello Dear Kids has a bunch of cute patterns, and almost all of them come with lots of options. The #R56 has options for a shirt, dress, romper, and bloomers. I made the shirt with a very small hack. The original pattern has the ruffle split in the front, just like it does in the back. I wanted the ruffle to be one continuous piece. I simply measured the space on the pattern between the end points for the front ruffle and added that to the end of the ruffle pattern piece, and noted to cut it on the fold. These ruffles remind me of a favorite shirt I had as a kid in the very early 90s. This shirt will give a gathered look when tucked into the skirt, or a trapeze tunic look when worn with the shorts or culottes. I also used covered buttons on these tops. Not only are they adorable covered in squares of color cut out from the checked material used in the ruffle, but I got to use a toy I bought for myself this year, a press with dies for cover buttons and snaps. It makes the buttons look so professional!
The Gigi skirt is the accompanying piece to the Mingo & Grace top from the last outfit. I chose to make the flat front waistband version of the skirt, because I like the clean look of a flat front when I make elastic pants and skirts for myself so why not carry it over to the kids? Which is another reason to love this pattern… the fact that the pattern designer Farrah has made sure to include all of the things that adults want in a pattern in this itty bitty version. “It has pockets!” Anyone who sews their own clothes has said this phrase at some point, right after “I made it”. And this pattern includes them.


Outfit 3: Fibremood Charlie Shirt & Adam Shorts

I have a Fibremood subscription for me, but they always have a couple of kids patterns in each edition. I remembered to go look to see what they had when searching for the right patterns for this collection and happily grabbed up the Charlie button down shirt and these super cute Adam shorts.
The Charlie shirt is a basic button down, no big surprises while making it. I really liked how they used a little strip of bias cut to encase the back neckline seam since this shirt doesn’t have a back yoke. I decided not to add the breast pockets on these because I like the uninterrupted flow of the print (obviously my favorite of the collection) I found some matching buttons with a bit of shine in them that give the shirts a little something extra.
These shorts may be my favorite thing in the wardrobes. I love the clever construction of the pockets on the outside of each leg. It reminds me of of the Papercut patterns Palisade Pants pattern for women. These were so easy to put together I would definitely recommend the pattern for even a beginner sewist. They look a lot more complex than they are, and came together very quickly.


Dress 1: The Eli Monster Driehoek Dress

The Driehoek Dress by The Eli Monster is a very 1960’s mod A-line dress. But it isn’t quite a simple mini dress with those drastic cut ins at the front of the shoulders. It’s an avante garde detail, and makes the dress anything but boring. The little flat bow detail is so wonderfully of the era as well. The pattern seems to be well drafted with a good set of instructions. Turning the dress can be a little bit difficult, as you a pulling a full half dress through those tiny straps that make the top of the cutout arm holes. It can be done, but might be intimidating for a beginner, advanced beginner might be a better fit for attempting this dress. I also would change one thing from the instructions.
The instructions have you put in the back zipper before sewing the side seams. But this forces you to finish the front and back facings separately. I sewed the side seams together first, then finished the full edge of the facing all together for the smoothest underarm finish. After that I added in my zipper, which I don’t think is made any more difficult for the side seams being finished.
This classic dress is going to look so good on the girls and since it is an A-line silhouette there isn’t a lot of fitting that needs to be done.

Dress 2: Bebekins Patterns Calli Dress

The Calli Dress was chosen for its versatility. With an elastic back waist and lace up construction it gives a lot of room for the kids to grow into the pattern. I also chose this because at 6-7 years old I would have felt like a princess in a lace up dress, and I want these collections to not only be great to look at, and follow some adult trends, but I also want the kids to want to wear these. I imagine these at a family picnic, long enough to sit in the grass, and full enough to make a great twirl.
I liked the pattern and it was fairly easy to make, and the instructions were easy to follow. It was also nice that since the skirt pieces are simply rectangles, the pattern designer gives you the measurements to cut, rather than me wasting paper printing out and taping together basic rectangles. This way I only need the chart and the bodice pieces.
I used the sandpiper print, which is adorable. I considered creating contrast straps, but in the end chose to just use the same material. You’ll see the beautiful lacing just fine without me adding one more fiddly cutout to my list on this project.


The finished collections
Now before I end this post, I wanted to share images of the collections all together, as opposed to above where I went by outfit. These images make me really happy. All the planning and hard work of cutting out three sizes of everything was so worth it to see them come together!
And me being me I had to create some cute packaging materials for sending this off to my friend. I called the collections “Island Groove” and named each colorway after an island in a different ocean/sea based on the feeling that the colors gave me.
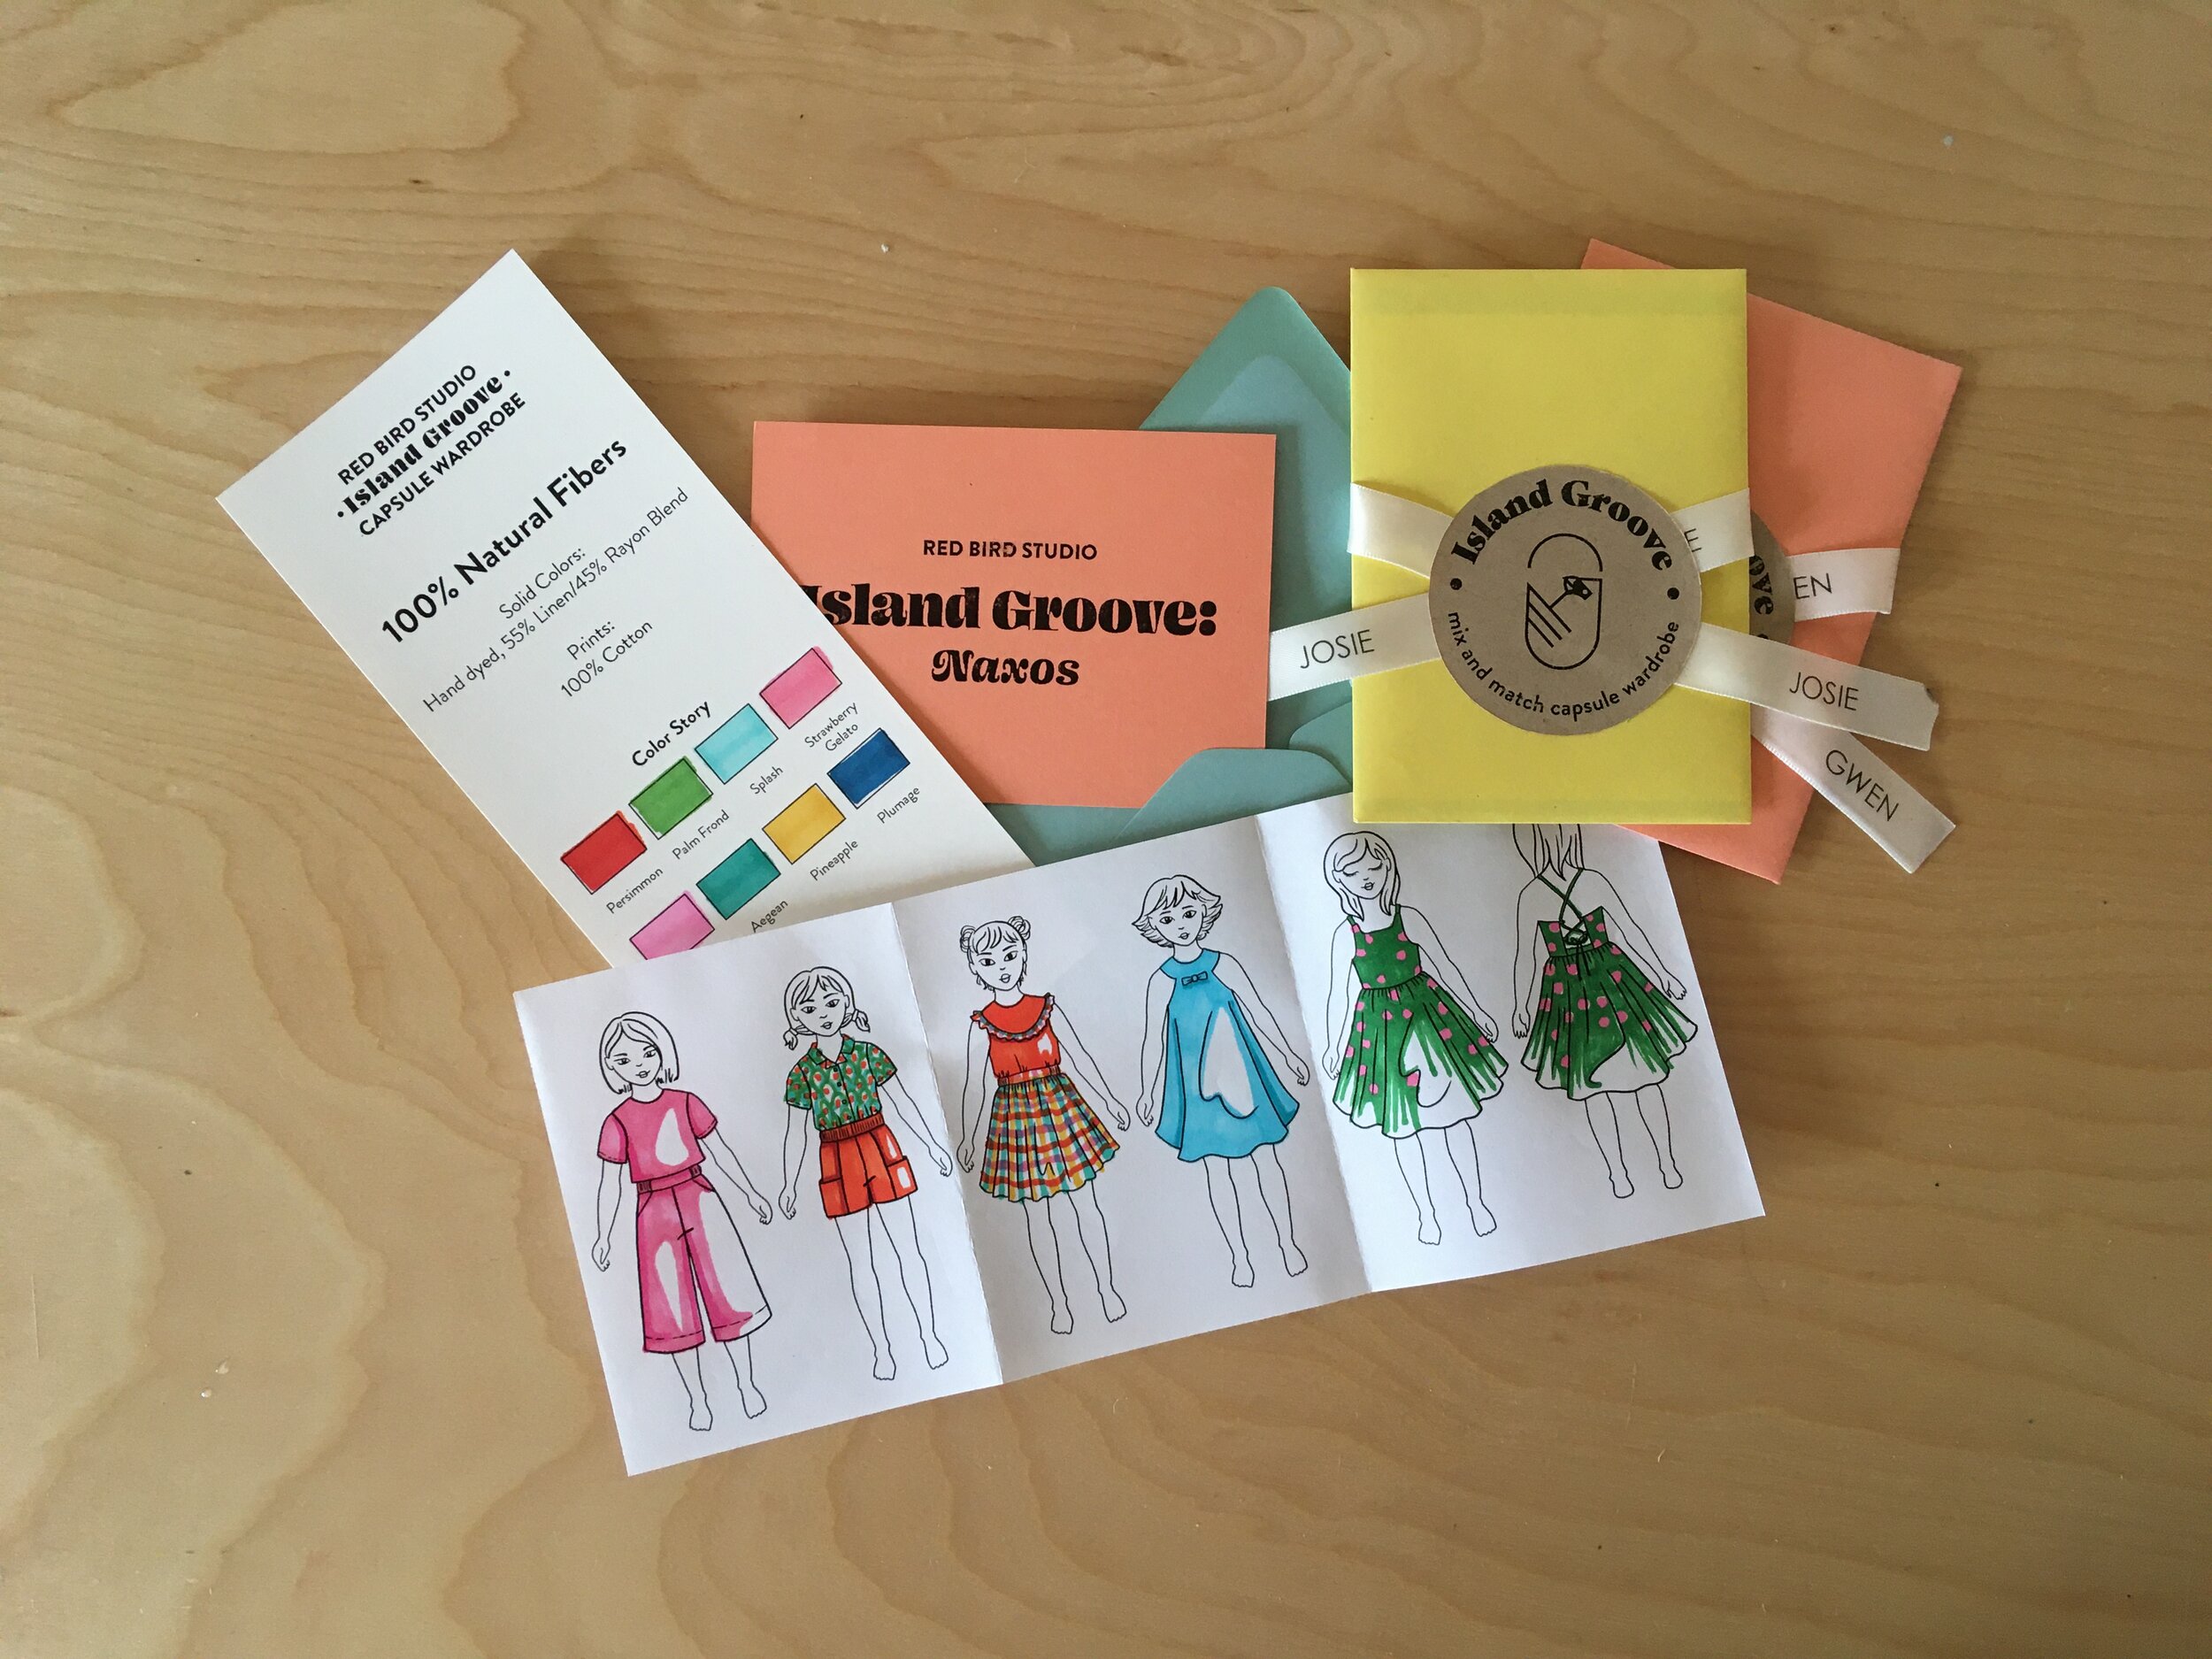

Naxos: named after the largest island in the Small Cyclades chain of Greek islands in the Aegean.

Lanai: named after the smallest inhabited island travelers may visit in Hawaii.

Guadeloupe: named after a small archipelago of six small islands in the Caribbean


